Introduction
to WinCVS
Saurabh Zadgaonkar
Concurrent Version System (CVS) is a code repository system developed under the GNU license. The repository is used to maintain central copy of source code. CVS is generally used to share and maintain code for team development environment. Some of the features of CVS are
- Keeping track of various versions.
- Various developers can work on same project without overwriting each others changes.
- Branching of source code.
- Merging two different versions.
- Tagging different versions.
- Viewing Difference between different versions.
- Browsing previous versions and reverting back to previous version.
CVS can be accessed through command line or by GUI tools like WinCVS or gcvs.
Our main discussion will be concerned with the use of WinCVS only.
WinCVS can be downloaded from http://www.wincvs.org/ . After downloading install this software on
your windows machine. If as a user you don’t have permission to install
software (e.g.
Login
After starting WinCVS one should log in to CVS Server. Click on Menu
Admin->Preferences you get following screen.
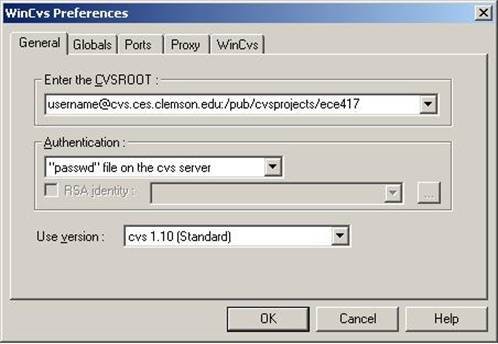
Type the path of CVSROOT. Here replace the “username” with your Clemson UserID , keep all other setting as shown in figure and click on OK. Type your password in next window. Specify the home directory. A file “.cvspass” is made by WinCVS in this directory which consists of encrypted password.
Setting Working
Directory
Working
Directory is local folder where working copy of module is present. This can be set by clicking on icon ![]() and then specifying the path
and then specifying the path
CheckOut
Checkout is term for getting local copy of module in working directory. To check out a module click on menu “Create-Checkout module…”
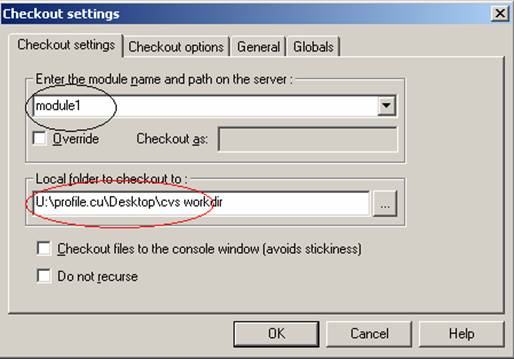
Type the above given information and click on OK. A working copy (generally read-only ) is made in the working folder. Given figure shows local directory and modules.
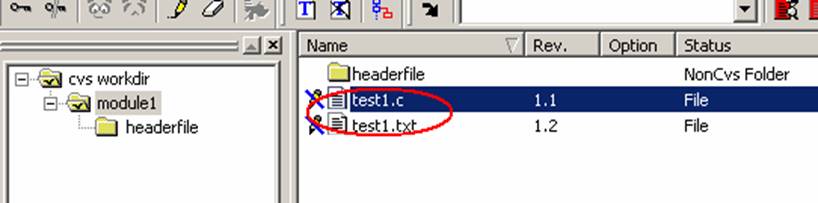
“test1.c” and “text1.txt” are files in module “module1” and currently read only. To edit a file select it and click “Trace->Edit Section” in menu. Right click on File and click on “Reload View” menu. Double click on the selected file to open it.
Committing Changes
After changes are made in local directory repository should be updated so that other developers can checkout the latest code. For this select the modified file and right click and click on “Commit selection”. (If someone’s module is dependent on your file then commit your files when your version is reasonably stable).While committing files type meaningful messages to keep track of changes you have done.
Add Files to
Repository
For adding new files to CVS first copy these files in you working module. Select file in WinCVS and click on “Modify->Add section” in menu. Commit this file so that repository is updated with latest added files.
Remove Files from
Repository
Select file in WinCVS and click on “Modify->Remove section” in menu. Commit this file so that repository is updated.
Updating Current
Versions
Frequently it is required to update the working copy. Generally this is done before you make any changes. Click “Modify->Update sections” in menu select proper options in the dialog prompted and click “OK” button.
Removing Working Copy
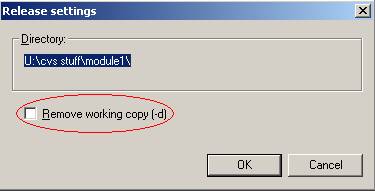
When you want to remove the working copy just don’t delete the working directory, use ‘release’ instead. Select the module in left hand pane of WinCVS. Click on “Trace->Release section” in Menu. Check the box (as shown in figure below) if you want to remove the working directory. WinCVS will ask for confirmation click on “YES” button. Press ‘F5’ or click “View->Refresh” to get the latest status.
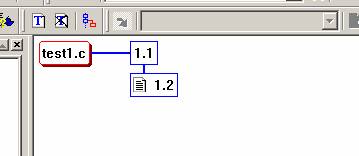
Viewing Versions
This can be done by selecting a file and clicking “Query->Graph section”. Following is the example of graphical output of version history. Click on the revisions on the graph to get its details in ‘Output Window’ of WinCVS.
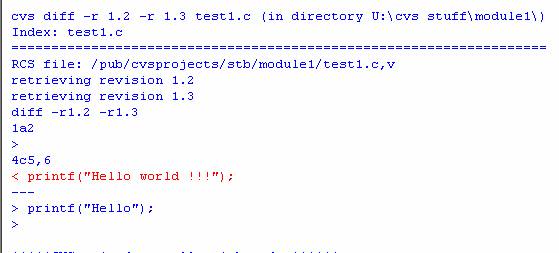
Viewing Differences
Select required file and click “Query->Diff Section”. WinCVS pops up a dialog to enter additional data. Click ‘Ok’ button. WinCVS will give you differences in the output window at the bottom of the screen. Given is the sample output. External diff utilities can be used for viewing differences.
Sauarabh Zadgaonkar,